DIY Embroidery Hoop Orb
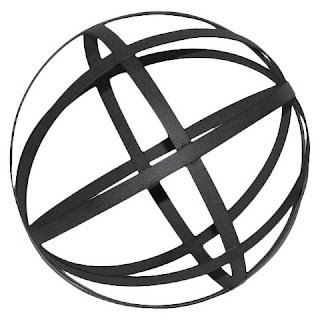
Metal Orbs are the 'in' decor item right now. Orbs come in all shapes and sizes. There are natural rope orbs, glass orbs, ceramic orbs, metal orbs, foil finish orbs, wooden orbs..…there’s an orb out there for everyone! However, some of these orbs can cost quite a pretty penny. So, if you love a well decorated home and you don't want to brake the bank... make your own wooden embroidery hoop orb. They are inexpensive, look great and are easy to make.
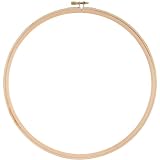
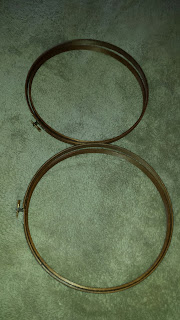
- 2 embroidery hoops
per orb (any size you want)
- foam brush
- wood stain
1. Disassemble each embroidery hoop. (you should have 4 total pieces)
2. Using a foam brush stain all surfaces of each embroidery hoop piece. Let dry completely.
3. Slide pieces together to form an orb as shown below. To assemble, use the two “inside” pieces of the embroidery hoops and slide one inside the other. Add a third hoop (one of the outer edges) and tighten it closed. Add the fourth hoop around all three of them, and Tighten hoop screws as needed.

4. Find a place to display your beautiful wooden orb and enjoy!

Do you have any wooden embroidery hoops laying around? Why not create something lovely?
P.S. If you decide you want to use them to embroidery again, just take them apart and go at it! "Decor you can use"! Haha!
Comments
Post a Comment
I'd love to hear your comments: